Sunday, March 6, 2016

Vending Machine Project Part 3: Postage Vending


Wait what?

If you have been following along my vending machine project part 1 and part 2 you might be wondering what happened to the toy capsule/gumball machine?  Have no fear, that project is still moving forward.  I can't contain all the ideas in my head so I had to add on more!

I got thinking about how I had to purchase some materials to work on the capsule machine.  If I was working on TWO machines, it would help disperse the overhead costs of the two.  Ok, so maybe I just really wanted a second machine to play with.  Yeah, maybe that was it.

Seriously though, this postage vending machine is the perfect vehicle to execute an idea I have.  A sticker vendor.  I have long had people suggest to me that I should offer stickers, stamped from my hand carved rubber stamps.  While I could do this from a capsule machine, it seems to make more sense to me to use the capsule vendor for stamps, and a postage vendor for stickers.

This old postage vending machine used to sell postage stamps in small cardboard "sanitary" folders.  Sanitary is on all these machines going back to the early 1900's when people feared that germs were getting passed along on the sticky back sides of postage stamps to the tongues of their victims.  The little folders held the stamp inside of it, protecting it from germs.  That might be true, but imagine if the stamps where not protected by some container, the gummy backsides would have probably stuck to each other in the machine as water vapor in the air moistening them.  These mini folders are about 1 inch by 1.75 inches, and will be perfect for protecting my sticker they will hold.

I also like the price point of fifty cents for a sticker.  Since I have two columns to work with on the postage vendor, my initial idea is to making it a kind of voting machine. Think of all those classic opposites... Coke vs. Pepsi, vanilla vs. chocolate, Chevy vs. Ford, Trump vs. Hillary (or whoever ends up getting on the ballot).  People can vote with two quarters.  Pick your side.  Pick'em and Stick'em.

What's that, this old machine looks dirty and old?  Nothing some sanding and painting won't fix.  I have to replace the lock, or create new keys, but the mechanisms on the inside are functioning great so far, and I hope that they will have years of life left in them.

OK, now I've got some work to do!


Thursday, March 3, 2016

Stamping All Year Long


I have advertised JackBear Stamps for several years running in the pages of Rubber Stamp Madness (RSM) magazine. The staff at RSM and I having many things in common, and I feel that my mission and theirs is a good fit.

One shared passion is a love for letterboxing. RSM has had articles on letterboxing, and online tutorials. I love that they have embraced letterboxing as an art form. We also share a sense of humor in our work. The editorial staff at RSM take a very light-hearted approach to the rubber stamping art form, and it comes through in the pages of the magazine.

RSM is a real community. They readers make submissions, and the editorial staff sift through the best to make the pages. Submissions are a huge part of the magazine, and I love reading the mail section as the readers share their experiences in stamping. Even the ads in the book are incredible! I am always inspired by each page I turn.

Rubber Stamp Madness has published two previous large volume book releases, and they now have a third 116 page book published called "Stamping All Year Long (SAYL)". The newest release focuses on artwork from all four seasons, and covering all the holiday seasons. SAYL is not just a full color book of eye candy but, "Stampers share information about each piece, providing tips, techniques and inspiration for your own stamping projects." The book contains layouts for inspiring greeting cards, calendars, and scenes of wonder.

The folks at RSM have reached out to me and asked if I would be interested in offering "Stamping All Year Long" on my Etsy shop. So if you are interested in picking up this limited release (yes, they do sell out... good luck trying to find the first two they published), you can purchase it through my etsy storefront. I let RSM know, and they ship it right out to you!

Happy Stamping!


Saturday, February 27, 2016

Vending Machine Project Part 2

 The vending machine restoration has begun!  Today I decided to start working on the exterior cosmetics of the machine. I targeted the small dents and sanding projects.

I began be taking out the interior mechanism of the vending machine.  There are really just a couple screws holding things in place, so this was elementary.  I downloaded a schematic of all the parts of the machine for future use reassembling, and I also took lots of pictures on my phone of all the parts before I took everything apart.

After the inside guts were gone, it was time to try to tackle the two small dents that are on one of the side panels of the metal housing.  I saw on YouTube that one tip to removing dents was to heat the metal with a hairdryer or heat gun to warm the metal first.  I did this then hit the dents from the inside on a wood spacer to distribute the force of the hammer.  Honestly, it did have some impact on the dents.  I didn't get the dents out completely, but by feel I could feel a that the dents were lessoned.  I can live with a few dents, it is a used machine after all.

After I finished with the dents, it was time to begin sanding.  I made sure to get a mask on before I started.  I had bought one along with a nice 3M sanding block that was about 100 grit.  I started on the bottom to see how it would work, and it was great at roughing up the old paint and removing any corroded parts (which are not much at all).  The sanding went great, and I got all the sanding done, inside and out, of the main exterior metal housing.

Next session I'll sand the top piece, which is also painted red at the moment.  Then I will clean it all up with mineral spirits to prep it for painting.  So what color is it going to be?

I really want to make it look like a vending machine for JackBear Stamps, so I'm going with my dominate color in my logo and branding, so it will be GREEN!  I also plan on painting the text from my logo on the sides panels.

Stay tuned until next time!


Monday, February 15, 2016

Vending Machine Project Part 1

Back in April of 2015 I came across the idea of selling art in a vending machine.  I don't know if something came across one of my numerous social media feeds, or if someone mentioned it in a meeting, but the spark of the idea took light in the tinder in my mind.  Since then I have been finding other similar projects others have embarked on. I also started trolling Ebay until I found the machine I wanted.  But I shouldn't get ahead of myself.

A great resource on art through vending machines I found at Callithump.org.  This blog has a great history page of other vending machine art projects over the last century.  Through their history page I learned aboutthe largest "art in a machine" projects: Art-O-Mat. Art-O-Mat machines can be found all over the US.  Each machine is a reconditioned cigarette vending machine that dispenses art in a cigarette pack, usually at the $5 price point.  Each machine itself is a work of art.  Out in Chicago, the Busy Beaver Button Company has been doing a Button-O-Matic project since 2002.  Using a toy capsule vending machine to sell buttons seemed like a natural fit.  I also reached out to the Vending Arts Project in London, Ontario.  Janine Wass said that the project wasn't a huge money maker but I love the idea of greeting cards through a repurposed snack machine.  And these were just a few I found!

With so much inspiration to draw from, I began bouncing ideas off my friends and family.  I began brainstorming idea.  Should I put mini rubber stamps in a machine, or buttons, stickers, or all of the above?  What would be the topic; mythical creatures, food, candy?  What price, 50 cents, $1.00? So after much thinking, and watching Ebay for a solid machine at a good price, I pulled the trigger.  I am now the proud owner of a Northwestern capsule vending machine that dispenses 2" capsules.

So the machine is mechanically solid.  It came with a 50 cent coin mechanism, but I will likely replace this shortly with a $1.00 coin mech (four quarters).  The paint is chipped in a few places, and it has a few dents, but I have been watching some YouTube clips and plan on giving it a nice facelift with a new color.  The plexiglass (polycarbonate) face has some scratches that I will try to buff our, or replace if necessary.  The machine can sit on a table right now, but I might add a wooden stand for it to sit on.  So after a little tender loving care, I'm sure it will be looking as good as new.

So what is going to be IN the machine?  What will come out of it?  Stay tuned....

Tuesday, February 2, 2016

The Empire Stamps Back

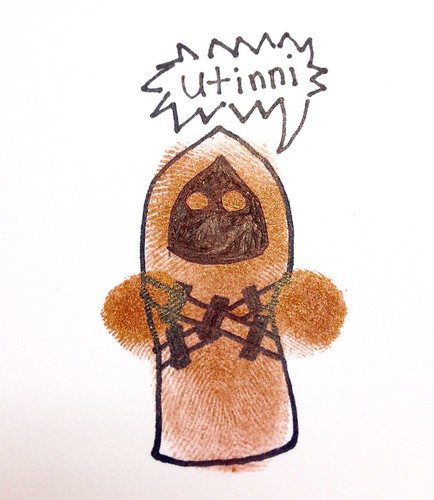
Back in November, I participated as an exhibitor at the Rochester Mini Maker Faire.  This was my second year (review from 2014). This year my project was called "The Empire Stamps Back."  I had various hand carved rubber stamps that I made, and instructions on how to doodle Star Wars characters from finger and thumb prints.  Participants could use these to create a free postcard to take home. The inspiration came from the book, "Star Wars Thumb Doodles" by Klutz.  With the upcoming release of "The Force Awakens" I thought this would be the perfect year to let kids play around with the Star Wars universe.

Here are some pictures you can click through of prints I made leading up to the event, then some from the Faire itself...
The Empire Stamps Back

The project was a big hit with the kids especially, and several adults.  The kids were willing to jump right in and take a risk.  Many of the adults seemed intimidated to make a postcard, or get inky.  It was interesting watch this psychology all day.  The children would run up to the table, and start right in, while the adults would take two steps back into a supervisory pattern to watch their offspring make something.

I didn't get a chance to circulate much around the Faire, but several adults circled back to tell me that my table was their kids favorite.

The project really helped me think about how each of these characters are made up of different shapes.  I know illustrators really start with shapes as the structure of a character, and this project helped me reverse engineer what some of the shapes were for humans and aliens alike.