Showing posts with label rubber stamps. Show all posts

Tuesday, December 27, 2016

Rochester Mini Maker Faire 2016 Review

Well, I did five PREVIEWS of my project for the Rochester Mini Maker Faire, I suppose I should do a REVIEW of it too!

The Rochester Mini Maker Faire 2016 was a great time.  The show began at 9 am and ended at 5 pm. We had someone in our booth until around 4 pm, when I turned to my wife who was there all day with me and I said, "Look, the booth doesn't have anyone in it!"  So you can see it was BUSY!

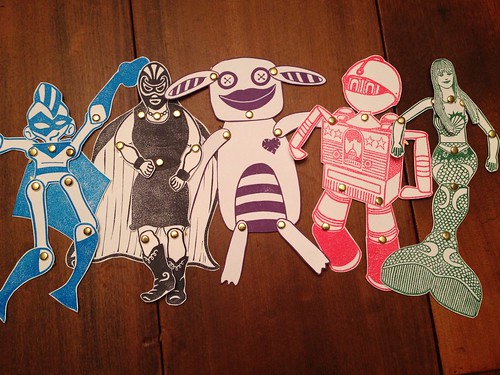
I was able to finish the stamps for all five of the characters.  All five were big hits.  I didn't keep track of how many of each got made, but it seemed that maybe Tory the Mermaid was the front runner, as I think the demographic of the attendees in my booth trended female, and the mechanics of the tail is hard to pass up.

What was equally great was the number of people to did "mash-ups."  We had a great assortment, and lots of combinations of characters.  I love it when someone uses a part for which it wasn't intended, like an arm gets used for an ear.  You will see a lot of them in the album below because I really tried to get as many as I could captured in the moment.

We definitely had more kids than adults.  The littlest ones really needed help with the scissors, so my wife and I helped cut out a lot of shapes.  As someone who works with stamps nearly everyday, I am still astonished at the folks that I can tell have never picked up a rubber stamp before.  My stamps are not mounted to wood, so that can be confusing at first, but getting people to get a decent print can be done, but it takes guidance.

One unexpected thing that happened was my choice in inks.  I specifically picked dye based ink.  It dries way faster than pigment ink, and that was important since folks would be going right from the stamping step to the cutting step.  If i had picked pigment ink, it would have smeared. Dye based ink however stains.  Stains fingers.  Stains fabric.  So I had to put up a little warning sign about that.  I think I may have only had one family who didn't do it because of that though.  It was still the right choice, but it took a couple days for my fingers to look normal again.

I loved this project so much.  I loved working with my artist friends to bring some of their characters to a different medium.   I loved helping folks MAKE something from scratch.  I loved carving these stamps.  I really want to make more of these, and maybe get some into my Etsy shop for 2017.  The last few years I have recycled my Maker Faire project for the ArtAwake event. So if you missed it, keep your eyes out for ArtAwake in 2017 and maybe you will be able to make one of these for yourself!

CLICK on the picture to see the whole album of photos.

Paper Dolls: Articulated Character Mash-Up

Friday, November 18, 2016

Rochester Mini Maker Faire Preview: Mermaid Tory

I will be presenting a new project for my third year at the Rochester Mini Make Faire on Saturday, November 19th, from 10 am to 5 pm at the Rochester Convention Center. Year one and year two were awesome, and I'm very excited about this year as well.

This year I am doing a project I am calling the Articulated Paper Creature Mash-Up.  That's a mouth full, but what is means is that you can come to my booth, stamp an image of various body parts of a character on cardstock, cut them out, and assemble the character with brass fasteners to create a poseable/jointed/articulated paper doll.  I have hand carved each of the pieces into a rubber stamp by hand, so you can build your creation from the ground up.

Oh, you mean like a paper doll that my grandma used to play with?  Well, sort of, but not exactly. The characters and creatures are not just little cute little girls with pony-tails.  The characters are from other local artist's imaginations.  You can build a single character, or mix-and-match pieces together to create a brand new mash-up.


Today I'm featuring Mermaid Tory!

Tory O'Neil is the woman behind Mermaid Tory and Friends.  Tory is a character performer and costume maker.  Tory says on her Facebook page that she began her career performing as various princesses for a "princess company."  Then she decided to create her own costumes and characters. As a character performer, she makes appearances at hospitals, festivals, parities, and museums.

Mermaid Tory's tail is an art piece in itself.  Made from neoprene and thousands of sequins, each carefully stitched into it's place, it is truly a show stopper.  That alone would make it incredible, but what takes it to another level is the fact that Tory can swim with it on.  That's right, it is waterproof, and she can swim with it!

One reason I was interested in doing a paper doll of Mermaid Tory was the fact that she has a strong sense of character.  Each of the paper dolls I carved this year had a personality beyond the paper. Some of the characters, like Fidget and Budd Jett, are three dimensional sculptures.  Ms. Lucha and Maker Kid are 2D illustrations.  Mermaid Tory though is a living, performing, art piece.  I think this variety nicely shows a range of what character art can be!

I'm very happy with how Tory's doll came out.  Carving each scale on her tail took a good deal of time, more so than some of the other dolls.  As I kept turning the block, and making a cut, just like the one before it, and repeating it over and over, I thought about how Tory had to stitch on each sequin, one after another, on her tail.  You get into a rhythm, a bit of zen, but you also wonder when you will finish it!

I'm very excited to share Tory the Mermaid's paper doll to the public at the Maker Faire this Saturday.


Tuesday, November 15, 2016

Rochester Mini Maker Faire Preview: Fidget

I will be presenting a new project for my third year at the Rochester Mini Make Faire on Saturday, November 19th, from 10 am to 5 pm at the Rochester Convention Center. Year one and year two were awesome, and I'm very excited about this year as well.

This year I am doing a project I am calling the Articulated Paper Creature Mash-Up.  That's a mouth full, but what is means is that you can come to my booth, stamp an image of various body parts of a character on cardstock, cut them out, and assemble the character with brass fasteners to create a poseable/jointed/articulated paper doll.  I have hand carved each of the pieces into a rubber stamp by hand, so you can build your creation from the ground up.

Oh, you mean like a paper doll that my grandma used to play with?  Well, sort of, but not exactly. The characters and creatures are not just little cute little girls with pony-tails.  The characters are from other local artist's imaginations.  You can build a single character, or mix-and-match pieces together to create a brand new mash-up.

I will highlight each character over the next few days.

Today I'm featuring KiraArts creation: Fidget!

Kira Sinclair is the woman behind the monsters at KiraArts.  I met Kira many years ago as part of the Rochester NY Etsy Street Team (RNEST).  Kira absolutely KILLS IT when making here handmade monsters.  She makes monsters like Fidget from upcycled sweaters.  She finds homes for these cast off sweaters that she is given by friends and family, and that she sources from second hand stores.  Color and pattern are important parts of her creations.  Combining them in just the right way to bring a character to life.

Kira gives all of her monsters names to fit their personalities.  When I asked Kira about designing me a character for the Maker Faire, she came up with the drawing seen here.  I asked her what was it's name, and without a second pause, she said "Fidget".  I trolled back into her facebook photo's and found a gray and orange monster that had similar patterns so you can see it in 3D, but really each character is as unique as the sweater she uses.

Kira was at the Rochester Mini Maker Faire in 2015, showing how she creates her monsters.  She has a Etsy store online, and is a smash hit at all the arts+craft shows like Mayday Underground.

I know Fidget is going to be a popular character at the Mini Make Faire this year.  His ears are so expressive, that he can really display a range of emotions with them.  I just hope he will be as fun as the real thing (even if he is less squishable).


Thursday, November 10, 2016

Rochester Mini Maker Faire Preview: Ms. Lucha

I will be presenting a new project for my third year at the Rochester Mini Make Faire on Saturday, November 19th, from 10 am to 5 pm at the Rochester Convention Center. Year one and year two were awesome, and I'm very excited about this year as well.

This year I am doing a project I am calling the Articulated Paper Creature Mash-Up.  That's a mouth full, but what is means is that you can come to my booth, stamp an image of various body parts of a character on cardstock, cut them out, and assemble the character with brass fasteners to create a poseable/jointed/articulated paper doll.  I have hand carved each of the pieces into a rubber stamp by hand, so you can build your creation from the ground up.

Oh, you mean like a paper doll that my grandma used to play with?  Well, sort of, but not exactly. The characters and creatures are not just little cute little girls with pony-tails.  The characters are from other local artist's imaginations.  You can build a single character, or mix-and-match pieces together to create a brand new mash-up.

I will highlight each character over the next few days.

Today I am featuring Chris Charles's creation: Ms. Lucha

Chris Charles is a letterpress printer, and is the creator, owner, operator of Moon Rabbit Press.
I got to know Chris through our artist group that sells work on Etsy.com, the Rochester NY Etsy Street Team.  Chris has been printing her work on her own at Moon Rabbit since 2010.  Usually when I think of letterpress, I think of type, and sometimes some graphics.  Chris is all of that, but with another added layer.  Much of the graphics you see in Chris's work is also hand carved in linoleum by her own hands.  No machinery involved.  As a hand carved, I totally respect that.

Ms. Lucha, as we are now calling her, has been around for awhile actually.  Ms. Lucha is the star character on a poster Chris has been selling for years.  The story goes something like this.  Chris is approached to do a poster for an upcoming concert.  The performers are were Eilen Jewell and Los Strait Jackets.  Chris combines the flavors of both musicians and carves up a cross-dressed luchadore, complete with lipstick and cowboy boots.  It's a killer design, don't you think?

I have seen the poster for years in here craft booth at local art shows.  I'll confess, I'm a huge wrestling mark.  I love this gender bending design, and thought it would be totally rad to bring Ms. Lucha to life so she could be posed in the wrestling moves she was born to do.

Chris prints most of her work on the presses at the Genesee Center for the Arts and Education.   Her work can be found at most of the major arts+crafts show around Rochester and beyond, like Artist Row, Mayday Underground, and the Clothesline Art Show.  She always finds the right blend of text, graphic, and color to make her work stand out, like her best selling crowing rooster with the text, "Rise and Shine, Bitches!"

I can't wait to see how Ms. Lucha (prototypes pictured) gets further mashed up with other characters at Maker Faire.  I know the fists will be flyin'!


Wednesday, November 9, 2016

Rochester Mini Maker Faire 2016 Preview: Maker Kid

I will be presenting a new project for my third year at the Rochester Mini Make Faire on Saturday, November 19th, from 10 am to 5 pm at the Rochester Convention Center. Year one and year two were awesome, and I'm very excited about this year as well.

This year I am doing a project I am calling the Articulated Paper Creature Mash-Up.  That's a mouth full, but what is means is that you can come to my booth, stamp an image of various body parts of a character on cardstock, cut them out, and assemble the character with brass fasteners to create a poseable/jointed/articulated paper doll.

Oh, you mean like a paper doll that my grandma used to play with?  Well, sort of, but not exactly. The characters and creatures are not just little cute little girls with pony-tails.  The characters are from other local artist's imaginations.  You can build a single character, or mix-and-match pieces together to create a brand new creation.

I will highlight each character over the next few days.

The next character is Randy Duncan's Maker Kid.

Randy Duncan is a illustrator, sculptor, painter, and probably other hidden talents I'm unaware of because he always dazzles me with his talent.  When I asked Randy about collaborating on this project, he had Maker Kid drawn up within hours, and had sketched out all the body parts individually in the next 24 hours.  Randy is extremely productive, it isn't uncommon to see his new work on a daily basis on his facebook feed.

I asked Randy for a masked superhero type character, with long limbs.  I had seen illustrations he had done of Spiderman, and his version of Spidey reminded me of the work of comic artist Eric Larsen's version of Spiderman.  Long, thin limbs, that bend at almost impossible angles.  Randy hit the nail on the head in his first draft, with a boy like character, with a mask, cape, and long legs.  It was in Randy's second draft he gave our masked kid a mohawk.  That was a great addition, as it really cleaned up the design around the head, to highlight those long arms and legs.

I will confess, I am a not too subtle fanboy of Randy's work.  He is part of an artist collective called "Dude's Night Out".  The DNO exhibit work across the city or Rochester, and also exhibit at the Rochester Mini Maker Faire.  I got to know Randy through arts+craft shows, but I have seen his gallery shows at Roc Brewing Company, Record Archive, and several other openings around the city. I have several of Randy's illustrations in marker and watercolor hanging in my studio that serve as inspiration to continue to hone my craft.  I even have a swing top bottle covered in skulls and creepy worms he did as a commission for me to hold beer (or moonshine).

I am super pumped to be able to share Maker Kid (prototypes pictured) with the Maker Faire visitors, and spread the word about the artistic talents of Randy Duncan.


Sunday, March 6, 2016

Vending Machine Project Part 3: Postage Vending


Wait what?

If you have been following along my vending machine project part 1 and part 2 you might be wondering what happened to the toy capsule/gumball machine?  Have no fear, that project is still moving forward.  I can't contain all the ideas in my head so I had to add on more!

I got thinking about how I had to purchase some materials to work on the capsule machine.  If I was working on TWO machines, it would help disperse the overhead costs of the two.  Ok, so maybe I just really wanted a second machine to play with.  Yeah, maybe that was it.

Seriously though, this postage vending machine is the perfect vehicle to execute an idea I have.  A sticker vendor.  I have long had people suggest to me that I should offer stickers, stamped from my hand carved rubber stamps.  While I could do this from a capsule machine, it seems to make more sense to me to use the capsule vendor for stamps, and a postage vendor for stickers.

This old postage vending machine used to sell postage stamps in small cardboard "sanitary" folders.  Sanitary is on all these machines going back to the early 1900's when people feared that germs were getting passed along on the sticky back sides of postage stamps to the tongues of their victims.  The little folders held the stamp inside of it, protecting it from germs.  That might be true, but imagine if the stamps where not protected by some container, the gummy backsides would have probably stuck to each other in the machine as water vapor in the air moistening them.  These mini folders are about 1 inch by 1.75 inches, and will be perfect for protecting my sticker they will hold.

I also like the price point of fifty cents for a sticker.  Since I have two columns to work with on the postage vendor, my initial idea is to making it a kind of voting machine. Think of all those classic opposites... Coke vs. Pepsi, vanilla vs. chocolate, Chevy vs. Ford, Trump vs. Hillary (or whoever ends up getting on the ballot).  People can vote with two quarters.  Pick your side.  Pick'em and Stick'em.

What's that, this old machine looks dirty and old?  Nothing some sanding and painting won't fix.  I have to replace the lock, or create new keys, but the mechanisms on the inside are functioning great so far, and I hope that they will have years of life left in them.

OK, now I've got some work to do!


Thursday, March 3, 2016

Stamping All Year Long


I have advertised JackBear Stamps for several years running in the pages of Rubber Stamp Madness (RSM) magazine. The staff at RSM and I having many things in common, and I feel that my mission and theirs is a good fit.

One shared passion is a love for letterboxing. RSM has had articles on letterboxing, and online tutorials. I love that they have embraced letterboxing as an art form. We also share a sense of humor in our work. The editorial staff at RSM take a very light-hearted approach to the rubber stamping art form, and it comes through in the pages of the magazine.

RSM is a real community. They readers make submissions, and the editorial staff sift through the best to make the pages. Submissions are a huge part of the magazine, and I love reading the mail section as the readers share their experiences in stamping. Even the ads in the book are incredible! I am always inspired by each page I turn.

Rubber Stamp Madness has published two previous large volume book releases, and they now have a third 116 page book published called "Stamping All Year Long (SAYL)". The newest release focuses on artwork from all four seasons, and covering all the holiday seasons. SAYL is not just a full color book of eye candy but, "Stampers share information about each piece, providing tips, techniques and inspiration for your own stamping projects." The book contains layouts for inspiring greeting cards, calendars, and scenes of wonder.

The folks at RSM have reached out to me and asked if I would be interested in offering "Stamping All Year Long" on my Etsy shop. So if you are interested in picking up this limited release (yes, they do sell out... good luck trying to find the first two they published), you can purchase it through my etsy storefront. I let RSM know, and they ship it right out to you!

Happy Stamping!


Saturday, February 27, 2016

Vending Machine Project Part 2

 The vending machine restoration has begun!  Today I decided to start working on the exterior cosmetics of the machine. I targeted the small dents and sanding projects.

I began be taking out the interior mechanism of the vending machine.  There are really just a couple screws holding things in place, so this was elementary.  I downloaded a schematic of all the parts of the machine for future use reassembling, and I also took lots of pictures on my phone of all the parts before I took everything apart.

After the inside guts were gone, it was time to try to tackle the two small dents that are on one of the side panels of the metal housing.  I saw on YouTube that one tip to removing dents was to heat the metal with a hairdryer or heat gun to warm the metal first.  I did this then hit the dents from the inside on a wood spacer to distribute the force of the hammer.  Honestly, it did have some impact on the dents.  I didn't get the dents out completely, but by feel I could feel a that the dents were lessoned.  I can live with a few dents, it is a used machine after all.

After I finished with the dents, it was time to begin sanding.  I made sure to get a mask on before I started.  I had bought one along with a nice 3M sanding block that was about 100 grit.  I started on the bottom to see how it would work, and it was great at roughing up the old paint and removing any corroded parts (which are not much at all).  The sanding went great, and I got all the sanding done, inside and out, of the main exterior metal housing.

Next session I'll sand the top piece, which is also painted red at the moment.  Then I will clean it all up with mineral spirits to prep it for painting.  So what color is it going to be?

I really want to make it look like a vending machine for JackBear Stamps, so I'm going with my dominate color in my logo and branding, so it will be GREEN!  I also plan on painting the text from my logo on the sides panels.

Stay tuned until next time!


Tuesday, February 2, 2016

The Empire Stamps Back

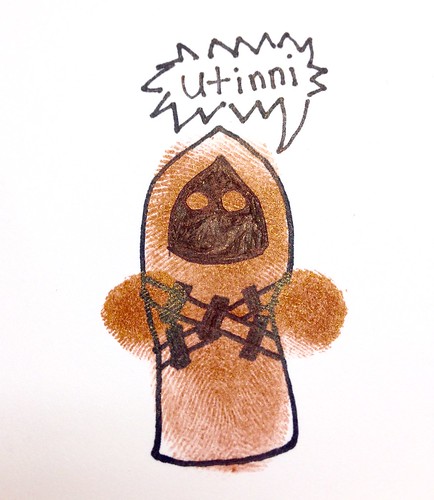
Back in November, I participated as an exhibitor at the Rochester Mini Maker Faire.  This was my second year (review from 2014). This year my project was called "The Empire Stamps Back."  I had various hand carved rubber stamps that I made, and instructions on how to doodle Star Wars characters from finger and thumb prints.  Participants could use these to create a free postcard to take home. The inspiration came from the book, "Star Wars Thumb Doodles" by Klutz.  With the upcoming release of "The Force Awakens" I thought this would be the perfect year to let kids play around with the Star Wars universe.

Here are some pictures you can click through of prints I made leading up to the event, then some from the Faire itself...
The Empire Stamps Back

The project was a big hit with the kids especially, and several adults.  The kids were willing to jump right in and take a risk.  Many of the adults seemed intimidated to make a postcard, or get inky.  It was interesting watch this psychology all day.  The children would run up to the table, and start right in, while the adults would take two steps back into a supervisory pattern to watch their offspring make something.

I didn't get a chance to circulate much around the Faire, but several adults circled back to tell me that my table was their kids favorite.

The project really helped me think about how each of these characters are made up of different shapes.  I know illustrators really start with shapes as the structure of a character, and this project helped me reverse engineer what some of the shapes were for humans and aliens alike.


Monday, May 4, 2015

May the 4th B w/ U

Ah, May 4th... Star Wars day.  May the fourth be with you.  Only geeks would come up with this stuff (myself included).  It is so cheesy it's tasty.

So much of my playtime as a child of the 80's revolved around Star Wars.  I had nearly every action figure, and would spend hours inside and out playing with them.  In fact I think there is still a Luke Skywalker in Besbin outfit buried somewhere under my parents pine tree near the fence.  I have shown my daughter the original trilogy so "the circle is now complete," as Vader would say.

In honor of Star Wars Day, and in anticipation of the upcoming Episode 7, the Force Awakens, I have posted a few photo's of rubber stamps that I carved for letterboxes several years ago.


Can you tell my favorite movie was Episode 4?

Now go check out my sister's blog and her works of art she posted for Star Wars day.


Saturday, February 7, 2015

WXXI Arts in Focus Feature on JackBear Stamps (behind the scenes)

The story begins at the Rochester Mini Maker Faire.  My friend Dan Bentley, who makes the most incredible robot sculptures called Retrobots, had his 'bots on display near my table.  We were passing time as we waited for the doors to open.  He mentioned that he had been approached by WXXI producer Tom Dooley about being featured on a new program that would be called Arts in Focus. The show would showcase artists from Rochester and around the country.  He asked if he should put in a good word for me.  "Sure!" I said.

Before the end of the day, Tom Dooley who had stopped by to talk to Dan and check out the Maker Faire came over to my table to introduce himself.  I explained what I did, gave him my card, and he said he would get in contact with me.  I was a little surprised when he did, and we set up a time for him to come to my home and do an interview.  He said he would like to do the interview in my creative space.  I don't think he knew that at that moment that my creative space was a cold basement room with pretty crummy light.

Tom showed up at my house in late December with videographer Jim Day.  I said we could shoot in the dining room with good light, or the living room that was a bit less echo-y. They said they wanted to see where I worked.  As soon as they walked into the basement they said, "yes, let's do it here." Fortunately I worked for days cleaning it up.  Not too much, I wanted to leave artwork from my friends in RNEST, and that made by my daughter to remain in the background had they chose to shoot in this space.  Jim asked up to give him a little time to set up a few lights and get things set up in the room.  Tom and I talked a bit about how the show would go and I pried into his world travels a bit.

Jim called us back to the basement and we got the microphone and sounds checks done.  Then Tom asked me questions.  I did not know what the questions would be before time.  I was confident in being able to field most questions they would have.  After doing some podcasting in the past, I wasn't afraid of the camera or microphone.  Unlike podcasting, I didn't have the ability to self censor myself, or do something over.  However, I had trust that the pro's at WXXI like Tom and his editors would be able to cut things together to make me sound good, and to tell a coherent story, even if I wasn't able to do that on the fly.  I think all the questions went great, until they got to the question I had dreaded, but knew would come up, "how is what you do art?"

Well, I fumbled my way through the question, going in very esoteric directions.  After I finished, Tom asked me the question in a different way, and asked me to clarify some things.  I don't remember exactly what he asked, but it worked, and I answered the question in a different way that didn't sound so idiotic.  I have always viewed my work as a bit more mechanic, more craftsman.  But after answering the questions Tom presented, I came to a new conclusion.  Sometimes my work is very "paint by numbers," but other times I am making artistic decisions about what to include, what to leave out, what mood or movement do I want to bring to the stamp.  And wouldn't you know, this was a very important part of the interview that made the final cut.

After about an hour of talking, we moved over to the carving table and I worked on a stamp of the Bausch & Lomb building from the Rochester skyline.  I felt very comfortable in this roll, as Jim worked his way around the table getting different angles.  I always wanted some video of me doing this, so this was cool to see it happening.

Tom and Jim finished up and we said our farewells.  They informed me that the segment would be cut down from a couple hours of footage to about 5 minutes.  I didn't envy them that job, but knew as professionals they had it covered.  I emailed a few high-res scans that they wanted to use in the segment, and I waited patiently for the premiere.

I was a bit shocked when the show got advertised in the Democrat & Chronicle newspaper in mid-January, and they used a picture of me carving!  I didn't see that one coming.  Cat was out of the bag now!  People at work started calling me Jack Bear.  Oh boy, time to embrace this thing.

Well, the day came, and the show aired on WXXI on February 6, at 8:30 pm (prime time people!)  I DVR'd it, and watched it with my wife later that evening when she got off of work.  I crossed my fingers and hoped I wouldn't sound ridiculous.  My fears were immediately relieved when I heard my voice and knew I had been well taken care of.  And what good company I had on the show; Ward Stare for crying out loud!  Man, am I honored to be on the same show as this talent.


So that is the behind the scene story of my interview!  Thank you so much to Dan, Tom, Jim, and all the other behind the camera folks that work to put this show on the air at WXXI.  I'm on cloud nine.

Monday, September 15, 2014

Origin Story

original photo
First I will confess I am tired of origin stories.  As a comic book reader in my youth I read so many stories about how superheroes came into being.  And very often the comic book writers rewrote those stories with new details, so I got those stories over and over.  Now that all the Marvel and DC movies are coming out to the big screen, I am seeing all these stories again.  I get it though, producers need to introduce the characters to new audiences.  Origin stories answer questions like "Why" and "How" the characters got to where they are now.  Who will ever forget: Adam and Eve, A babe wrapped in swaddling clothes and lying in a manger, the Earth on Turtle's Back, or Krypton exploding.  They are both memorable and powerful.

I have probably written enough about how I became involved in a hobby called letterboxing, my need to carve my first stamp, and my letterboxing handle "jackbear."

But an origin story that I haven't told in much detail is the one of how I turned an avocation into a vocation.  It answers the questions, "How did I create JackBear Stamps?"

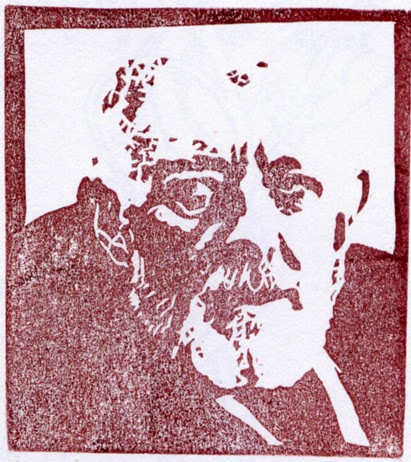
It began with an email and a photograph in May of 2008.  I received a message on Atlas Quest, my favorite letterboxing website.  A letterboxer, going by the handle of JBBK, contacted me to carve a portrait stamp.  She was not confident in her own skills yet to carve faces, and she had a photo of her friend's boys (or maybe it was a relative?) that she wanted carved into a stamp to give to him as a gift. She wanted to know how much I charged.  I told her that I wasn't really carving for cash, but since I didn't know her at all up until this point, she could just order me some PZ Kut from Stampeaz.com, my carving medium of choice from my online supplier.  She was very pleased with that arrangement, and I had an opportunity to test my skills without too much pressure.

I ran the photo through some filters in photoshop, and managed to teach myself how to transform a full color photo into something black and white, and then into a line drawing that I could carve.  We worked out a size and I got started carving.

finished custom rubber stamp image
I don't remember how long it took me, but after I proofed it for the first time, I felt like I was onto something.  The biggest challenge for me, and many newer carvers, are "eyes."  If you don't get them right, the person looks strange.  If I had to carve the stamp again today, I would make a change or two, but for my first commissioned stamp for compensation I was pleased with the result.

The feedback I got was overwhelmingly positive. JBBK and the recipient of the stamp loved it, and I got some extra PZ Kut in the arrangement.  But more importantly, it sparked an idea in my head. Up until this point the people I knew through letterboxing all carved their own stamps.  No need for my services.  But after this transaction I realized there might be people who weren't confident yet in their carving skills, or they might have friends who were NOT in letterboxing that needed a stamp.  That had never occurred to me before.

Around the same time I had learned about Etsy.com.  Now there was a marketplace with low overhead that I could market my work through.  I rapidly researched how to set myself up as a business and get a sales tax number.  By that Fall I opened my etsy shop, and started selling stamps.

The rest is history as they say.  Every time I look at this stamp I think about how this was the one that started me on this journey of JackBear Stamps, and I will always remember it as part of my origin story.


Tuesday, February 4, 2014

Book Plates

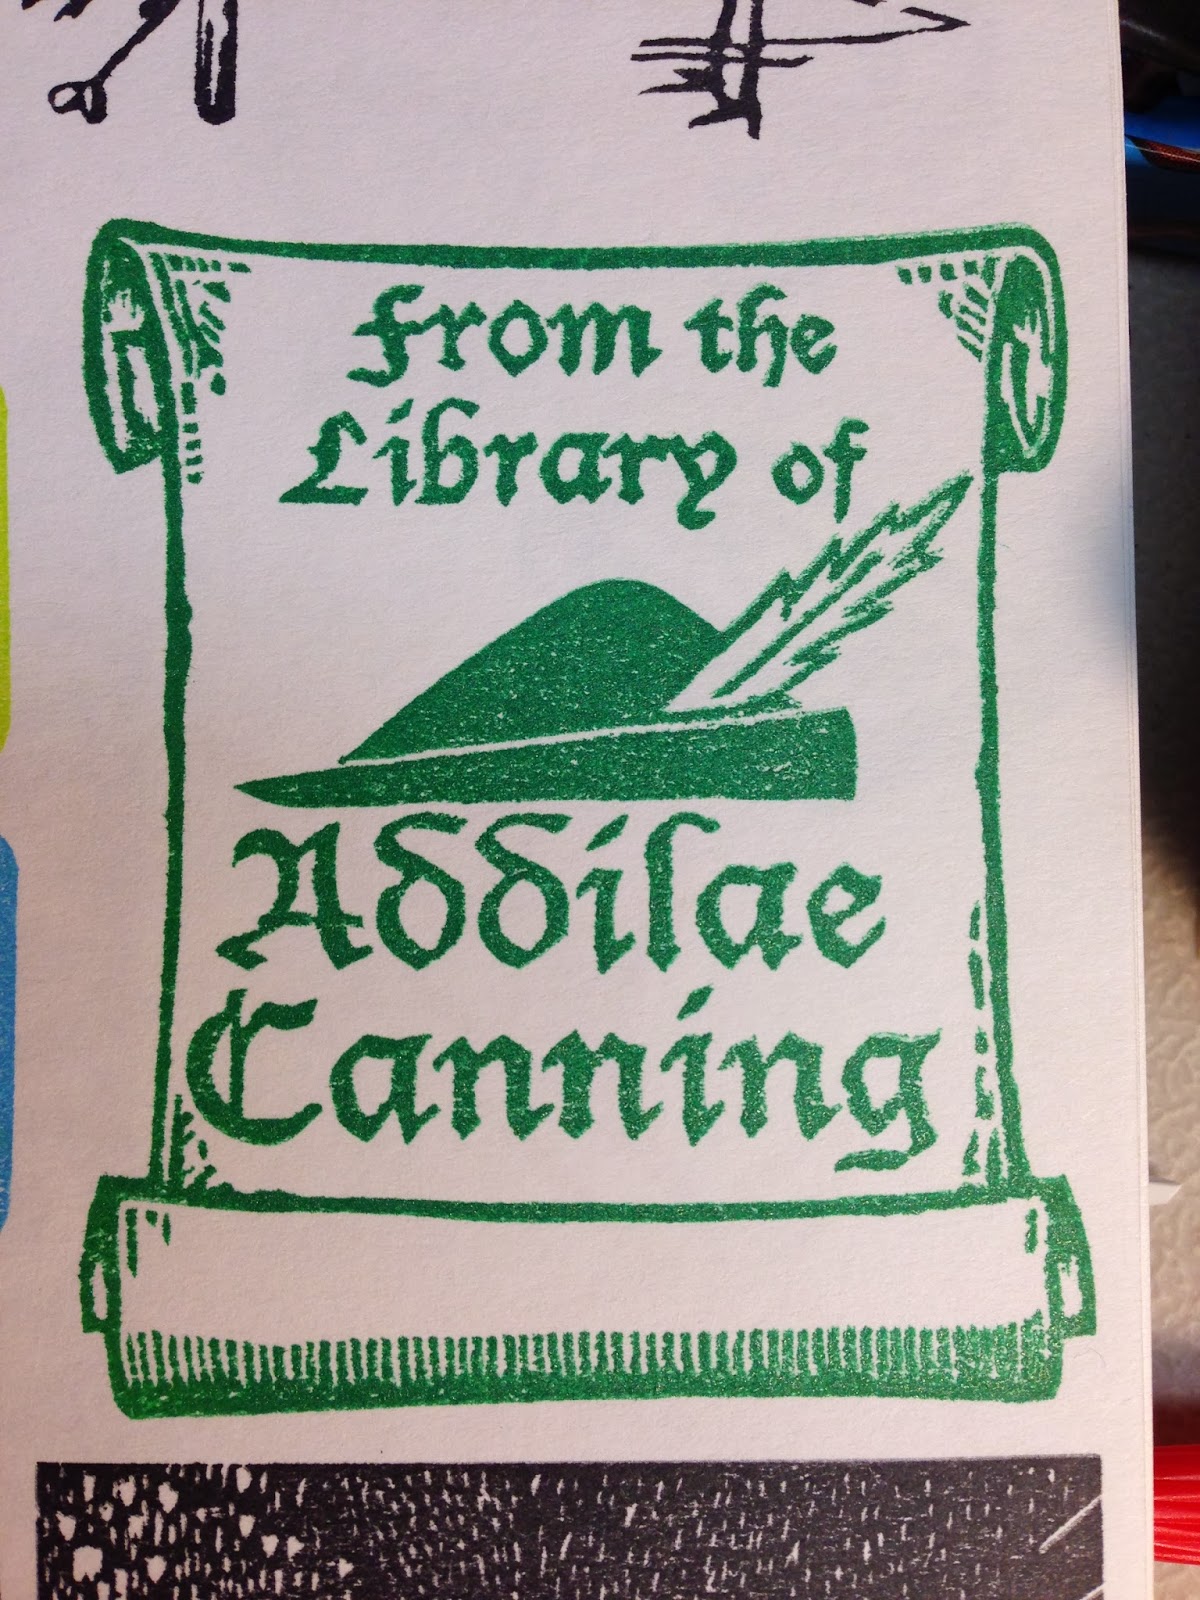
Why do I love book plates?  Maybe it's the graphics.  Maybe it's the ownership of a great book.  Maybe it's the uniqueness and personalization. Maybe it's the Latin!

Whatever the reason I have carved a ton of great bookplates.  I took some quick snapshots of a few I have done and pictured them below. I keep a master book of all the stamps I have carved so I have a visula record of stamps I have carved before.  Some of the images were provided by the customer. Some of them were modified or designed by me.  Enjoy!